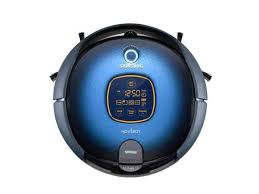
samsung robotic bagless vacuum cleaner sr8895

How to disassemble Samsung navibot SR8875? circuit diagram or schematic for accu loading Short shift and turn. These are some common tools used to work on this device. You might not need every tool for every procedure. Background and Identification ¶ The Samsung NaviBot is the new age in robotic vacuum cleaning; offering a more intelligent and more efficient way to clean your home. It cleans your carpets and floors with its triple brush system at the push of a button, and can self navigate and recharge itself when needed. It can also adjust itself depending on the environment and is the perfect modern day cleaner...leaving you more time to enjoy yourself. Mirror blue dust coverFoam Pre-Motor FilterHEPA Exhaust FilterDimensions: 360 x 360 x 105 (Net W x H x D, mm)Weight: 4kgBagless Dust Collection0.3m/sec cleaning speedNi-MH battery type SR8855 NaviBot Robotic Cleaner Cheap natural household cleaners Cheap household cleaning product Cheap green household cleaners
Cheap household cleaning products House Hold Vacuum Cleaner Robot Dibea T701 Robot f... Min. Order: 1 piece Vacuum cleaner Mother's gifts Fresh world Dibea BX... Super Clean Dust Cleaning Glue Slimy Gel Wiper For... 1 Pcs Household Products Static Electricity Dustin... Hot Sale Household Products Tandem Static Electric... Creative long-handled cleaning brush Cartoon spong... Vacuum Robot A325 Home improvement products ... All New Products Office Automatic Intelligent Vacu...
morphy richards vacuum cleaner 73415 reviews Sponges & Scouring Pads
dirt devil rechargeable handheld vacuum cleaner drc001 See all 6 Categories
sanyo vacuum cleaner bsc-1500a
Page 1: Vacuum Cleaner ✻ Before operating this unit, please read the instructions carefully. English ✻ For indoor use only. imagine the possibilities Thank you for purchasing a Samsung product. Page 2: Safety Information safety information sAFETY inFORMATiOn • Before operating the appliance, please read this manual thoroughly and retain it for your reference. WARning • Because these following operating instructions cover various models, the characteristics of your vacuum cleaner may differ slightly from those described in this WARning manual. Page 3: Important Safety Instructions, Save These Instructions safety information iMPORTAnT sAFETY insTRucTiOns When using an electrical appliance, basic precautions should be observed, including the following: READ All insTRucTiOns BEFORE using YOuR sTicK VAcuuM clEAnER. Unplug from outlet when not in use and before conducting maintenance. WARning : to reduce the risk of fire, electric shock, or injury: gEnERAl •...

contents ASSEMBLING THE CLEANER 05 Assembling the cleaner 07 Assembling the handle and the main body 07 Assembling the main body and the power brush 07 Assembling the main body and the handy cleaner 08 Charging 09 About the battery OpERATING THE CLEANER 10 Using the stick cleaner 10 Using the power brush... Page 5: Assembling The Cleaner assembling the cleaner AssEMBling ThE clEAnER Front view Rear view handle Power button The button to separate the handy cleaner Front vent Rear vent The button to separate the dustbin Dustbin The button to separate power brush charging pins Power brush power brush shutter charger... assembling the cleaner check the contents of the package. handle Main body handy cleaner Power brush charger screw guiding key sub items to assemble the user manual crevice / Dusting handle and the main body 06_ assembling... Page 7: Assembling The Handle And The Main Body, Assembling The Main Body And The Power AssEMBling ThE hAnDlE AnD ThE MAin BODY Insert the guiding parts of the handle as far as possible into the hole of the main body, insert the guide key into the holes of the handle and then fasten the screw with the (+) screw driver.

guiding parts guiding key handle... Page 8: Cleaner Charging assembling the cleaner chARging Install the charger on a flat surface and then plug the power cable. Turn the power buttons of the main body and the handy cleaner off. • The battery d oes not charge when the power button is Connect the handy cleaner to the main body. Page 9: About The Battery • Charge the product in the following cases. When using the product for the first time after purchasing it or after not using it for a long period. nOTE When the battery level is low and the suction power is weak. Page 10: Using The Stick Cleaner, Using The Power Brush, Using The Handy Cleaner operating the cleaner using ThE sTicK clEAnER Using the stick cleaner allows you to clean the floor without bending over. Stick Cleaner On / Off • When the power button is pressed, the operation alternates Power button between Only when the handy cleaner is assembled, does the stick cleaner work. Page 11: Using The Crevice / Dusting, Emptying The Dust Bin

Handy Cleaner On / Off • When the power button is pressed, the operation alternates between Connect the handy cleaner to the main body after Power button using it. cAuTiOn When you connect the handy cleaner to the main body, make sure to turn the handy cleaner off. Page 12: Operating The Cleaner operating the cleaner Empty the dust bin. Close the dust bin cover. Push the dust bin down until it “clicks” into place. ‘click’ • Using a plastic bag This method is recommended for people with allergies or asthma. nOTE Cleaning the dustbin with cold water is also recommended. Page 13: Cleaning The Filter maintain tools and filter clEAning ThE FilTER Press the [buttons to separate the dustbin] with your thumb and middle finger and then pull it out. Lift the dustbin cover. hepa filter Hold the dust bin cover and separate the grill filter and the micro filter from the dust bin cover by pulling them and pressing the grill filter fixing hook. Page 14: Countermeasure To Remove Anything

maintain tools and filter Maintaining the filter • Do not dry it near a microwave or fire. • Do not clean it by putting it into a washer or using an unapproved detergent. (See cAuTiOn page 5). • After cleaning, dry it completely in the shade. If you use the filter when it is not completely dried Moisture or water may enter the motor and cause a problem. Remove any hairs and threads around the drum with a vaccuum cleaner. Install the belt onto the drum and fix the drum using the fixing grooves. After fixing the drum, insert the air inlet cover into the groove and assemble it by slightly sliding it down. troubleshooting PROBlEM sOluTiOn Motor downs and does • Check cable, plug and socket. • Leave to cool. suction force is gradually • Check for blockage and remove. low or decreasing • Please check filters. If required clean it as illustrated in the instruction. If you have any connects or questions, regarding a Samsung Products. Contact the SAMSUNG Customer Care Center.